AWS Fundamentals - Part 11: CloudFormation
23 Mar 2019Let’s imagine you want to build an application on AWS. To support that application, you need two EC2 instances running inside a single VPC, each with public IP addresses. The VPC needs to have all the necessary configuration to provide Internet access to the services running within it. You also need an S3 bucket to store some files, plus you need some IAM policies to grant access into the environment for other administrators. Sounds simple enough - you can use the AWS console to provision and configure the services you need and that shouldn’t take too long.
Now though, as things were so successful the first time around, you’ve been asked to build another application - and this time, it’s much larger. You need around 50 EC2 instances, spread across multiple VPCs, plus multiple S3 buckets and a more complex set of IAM policies. Not only that, but it seems the new application might need to be deployed multiple times, in different AWS regions, possibly with some slightly different configuration settings on some of the deployments. You’re starting to panic slightly at the thought of this - how are you going to deploy this larger environment easily - with no errors - and then be able to replicate it many times over? You could try and use the console, but it’s going to take you an extremely long time just to deploy one environment, and it’s probably going to be strewn with errors as well.
Step forward CloudFormation. CloudFormation is a tool provided by AWS that allows you define your AWS infrastructure as a single configuration file, or split over multiple configuration files in larger environments. CloudFormation is often described as a tool enabling ‘infrastructure as code’ - the idea being, you define every service and configuration item you need in a scripted format, which means you are able to reuse that configuration, treat it just like any other piece of code (check it in to a version control system, etc). Once you have everything you need defined in the CloudFormation template, you send it to AWS to be deployed and the platform does the hard work for you - usually in just a few minutes or less. Even better, because you now have everything defined in a file, you can deploy that file as many times as you like, with exactly the same results every single time.
The great thing about CloudFormation is that you don’t actually pay anything for it - you obviously pay for the resources that are provisioned through the CloudFormation template, but you aren’t paying any extra to actually use CloudFormation itself.
One other thing to be aware of is that although CloudFormation is the ‘native’ AWS infrastructure as code offering, it isn’t the only option available. The other obvious one is Terraform by Hashicorp, which is also quite popular and widely deployed.
Ok, now that we know what CloudFormation is, let’s jump in and see how it works.
CloudFormation Templates
The first thing to understand with CloudFormation is the template. A template is simply a file containing a declaration of all the resources you want to provision in AWS and how those services should be configured. For example, I might have a simple template that states that I want a single EC2 instance, with that instance being connected to a pre-existing VPC and having a single EBS volume attached. What language do you use to build the template? Well actually, you have two choices here: JSON or YAML. Which one is better? Well, I’ll leave that up to you to decide - it’s often just down to personal preference. Having said that, I know a lot of people do prefer YAML for building Cloudformation templates as it’s a bit more ‘human readable’. Here’s an example comparing the creation of a single S3 bucket using JSON and YAML so you can decide for yourself:
JSON
{
    "Resources" : {
        "HelloBucket" : {
            "Type" : "AWS::S3::Bucket"
        }
    }
}
YAML
Resources:
  HelloBucket:
    Type: AWS::S3::Bucket
There’s no doubt that JSON can be a bit trickier, missing a single curly bracket can break your entire script! Fortunately, a good editor (Sublime Text, Visual Studio Code, etc) will usually get you out of a hole here.
Let’s take a closer look at how a CloudFormation template is structured. Firstly, a template can have a number of different sections such as Resources, Mappings, Parameters, Transforms and Outputs. Don’t worry about what each of these do right now, but do be aware that only one of these sections is required: the Resources section. The reason this section is required is because defining resources is the whole reason CloudFormation exists in the first place - without resources, there’s little point in actually using Cloudformation. The Resources section of the template is structured like this (I’m using YAML as the format here):
Resources:
  Logical ID:
    Type: Resource type
    Properties:
      Set of properties
The first thing you can see under the Resources: section is a logical ID. This is just an identifier you give to the resource you are defining here - for example if I’m creating an EC2 instance, I might use a logical ID of MyEC2Instance. Note that this isn’t actually the name of the instance itself once it gets created - the logical ID really only exists inside the template and is used to reference this resource from other places in the template.
The next thing is the Resource Type. Here, you are specifying the actual AWS service you want to provision. You always specify the resource type using the following format:
service-provider::service-name::data-type-name
So for example, if I want an EC2 instance, the resource type would be:
AWS::EC2::Instance
If I wanted an S3 bucket, the resource type would be:
AWS::S3::Bucket
You can look up the resource type for the services you need at the documentation page here.
Next in the list is Properties. Properties are configuration options and items that you can set for a resource. If I’m creating an EC2 instance for example, one of the properties I need to set is the Amazon Machine Image (AMI) that I want to use to build the instance. Now as you would expect, the properties are going to differ depending on the type of resource you are creating. If I’m creating an S3 bucket, one of the properties required will be a bucket name, which clearly would make no sense on an EC2 instance. Here’s an example of setting the BucketName property:
Resources:
  S3Bucket:
    Type: AWS::S3::Bucket
    Properties:
      BucketName: MyBucket
Parameters
Before we discuss how to actually deploy templates, I wanted to introduce you to the concept of Parameters. If you think about how you might want to use CloudFormation templates, of course you want them to be reusable, but just as importantly, you want to be able to customise them for use in a wide variety of scenarios. For example, you might want to have an option that allows you to vary the number of EC2 instances you create each time. Or perhaps you want to be able to customise the template so that you can input a different CIDR range for your VPCs and subnets every time you deploy the template. You could of course just manually update the main template with the changes you need every time, but that isn’t very elegant and not particularly reusable.
Parameters allow you to customise your templates and accept input values each time you run the template. Let’s look at how this works. Within every template, there is a section named “Parameters”. Under this section, I might want to define a parameter called “vpcName”, which looks like this (in YAML format):
Parameters:
  cidrBlock1:
    Type: String
    Default: 10.0.0.0/16
    Description: CIDR range used for my VPC
In the above example, I’ve defined a parameter called “cidrBlock1” - this parameter needs to be of type “string” and also has a default value of “10.0.0.0/16” (in other words, if I don’t provide any input value for this parameter when I run the template, this parameter value will default to the IP range specified). I’ve also provided a description to make it clear what this parameter is actually for.
Ok, so I’ve defined the parameter - but just defining the parameter isn’t enough. Unless I actually reference that parameter from somewhere else in the template, it isn’t going to do anything useful. Continuing the example, in the resources section of my template, I might be defining a VPC. In that block of code, I can make reference to the parameter I’ve just defined:
Resources:
  VPC:
    Type: AWS::EC2::VPC
    Properties:
      CidrBlock:
        Ref: cidrBlock1
      EnableDnsSupport: true
      EnableDnsHostnames: true
      InstanceTenancy: default
So now, rather than manually defining the CIDR block in the resources section, I’m simply making reference to the parameter I’ve already defined. When I run the template, I can pass input to the parameter (e.g. through the CLI, or entering the value into a dialog box if I’m using the console).
It’s also possible to have a separate parameters file where I maintain all the values for my parameters. For example, I might have a separate file named “networking-parameters” that contains all of the values I need for a given environment. This is how it might look (this time in JSON just for a change):
[
    {
        "ParameterKey": "vpcName",
        "ParameterValue": "vpc1"
    },
    {
        "ParameterKey": "vpcCidr",
        "ParameterValue": "10.0.0.0/16"
    },
    {
        "ParameterKey": "subnet1Name",
        "ParameterValue": "vpc1-sb1"
    },
    {
        "ParameterKey": "subnet1Cidr",
        "ParameterValue": "10.0.1.0/24"
    },
    {
        "ParameterKey": "subnet2Name",
        "ParameterValue": "vpc1-sb2"
    }
]
In this way, I could maintain separate parameter files for the different environments I need to deploy - all I need to do is specify the correct parameters file whenever I deploy the template.
Creating a Stack
Once you have your template ready, the next step is to actually use it to deploy resources inside AWS. To understand how this is achieved, we need to get familiar with the concept of a stack. A CloudFormation stack is essentially the result of deploying a template - at the most basic level, it’s really just a collection of resources that you manage as a single entity. For example, if I have a CloudFormation template that defines five EC2 instances, three VPCs and two storage accounts, then once I deploy my template I will have a CloudFormation stack that includes all of those items. Once I am finished with my resources, I can simply delete the stack and all of the resources contained within it will also be deleted.
The other point about CloudFormation stacks is that if one of the resources I’ve defined within my template can’t be created for some reason (perhaps I’ve made a mistake in that part of the template, or maybe I have tried to use an S3 bucket name that is already taken), then the entire stack will be ‘rolled back’ and no resources will be created.
A stack can be easily created using the console - after clicking the ‘Create Stack’ button, you’ll be asked to specify the location of your template. You can specify a location in S3, or you can upload a template from your local machine. You’ll then be asked for a stack name and any parameter values that are needed for the template to run:
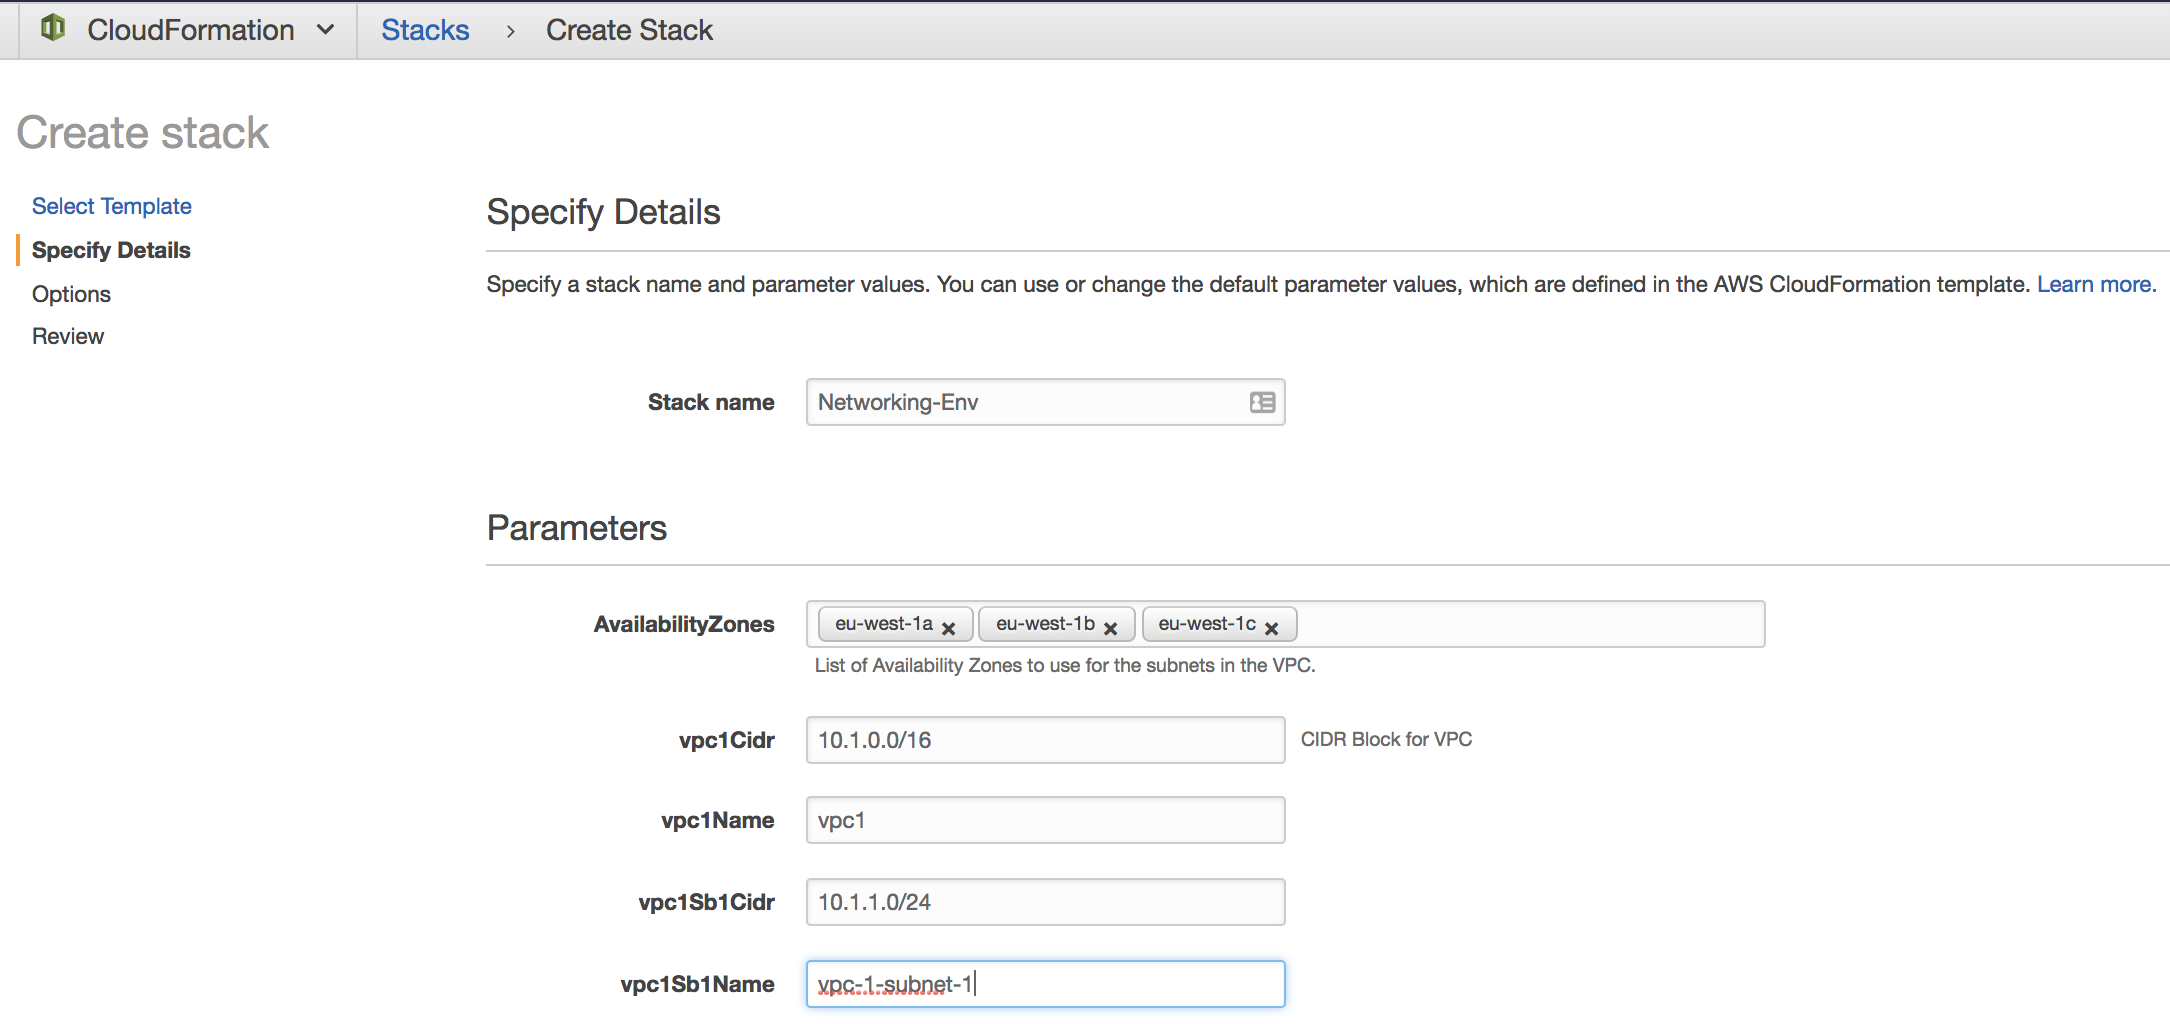
You’ll then have the option to review, after which you can create the stack.
You can also use the CLI to create the stack, for example:
aws cloudformation create-stack --stack-name networking-environment --template-body file://net-env-master.json
{
    "StackId": "arn:aws:cloudformation:eu-west-2:123456781234:stack/networking-environment/c4519d10-436d-11e9-98bd-06db0885f0f6"
}
In the above example, I called my stack “networking-environment” and am using a template named “net-env-master.json” to build it. I could have also passed in a parameters file using the –parameters switch on the command line.
Viewing Stack Information
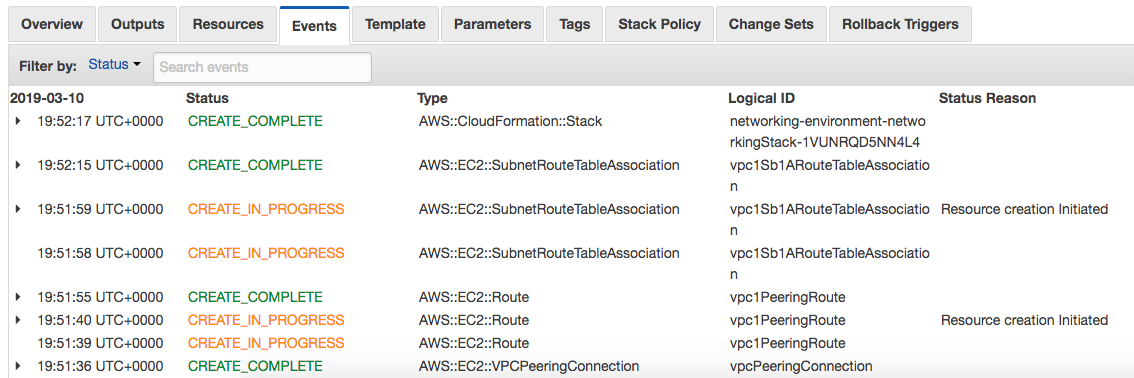
You can view information about the stack as it is being created, or after the stack creation process has completed. To start with, let’s look at events. In the CloudFormation console, if you check the box in the main area of the screen for the stack you’ve created, in the bottom half of the screen you’ll see another area where you can select “Events”. In this tab, you’ll see the status of each resource you are trying to create using CloudFormation - for example, CREATE_IN_PROGRESS, CREATE_COMPLETE or perhaps an error if the resource creation has been unsuccessful:
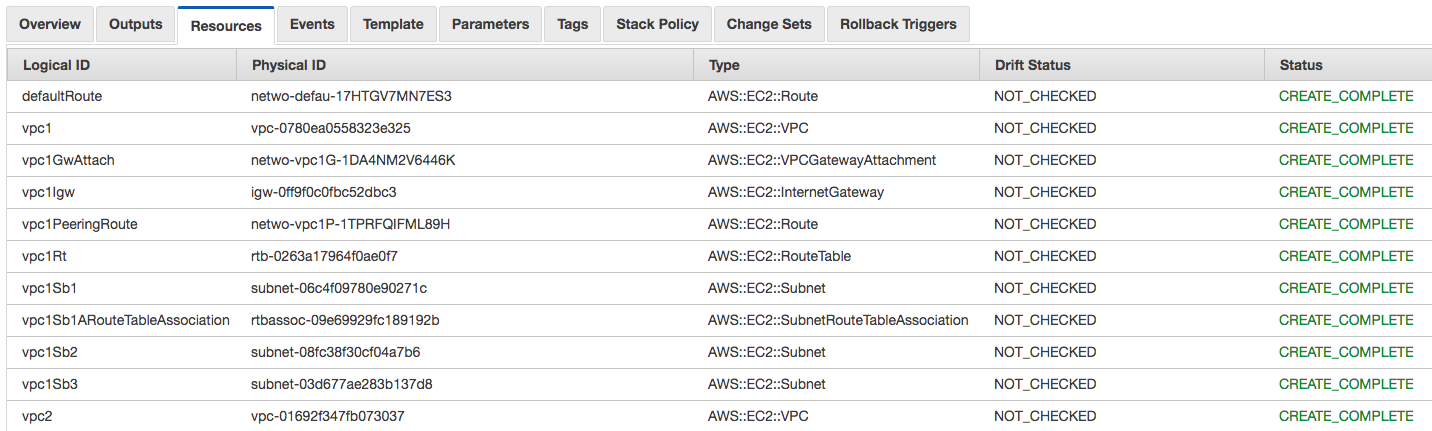
You can also see a list of all the resources created as part of the stack on the “Resources” tab:
One of the tabs in the bottom half of the page is named Outputs. An output from a CloudFormation stack is a piece of information related to that stack that you can use in other stacks by importing the info, or simply to view in the console so that you can use the information when configuring other parts of AWS. Here’s an example: let’s say you define an S3 bucket within a CloudFormation stack - because S3 buckets must have globally unique names, you use the template to generate a random name. However, you obviously don’t know what that random name will be, but you will need to use it for operations such as uploading or downloading data to / from that bucket. You can use outputs to show you that information once the stack has been created.
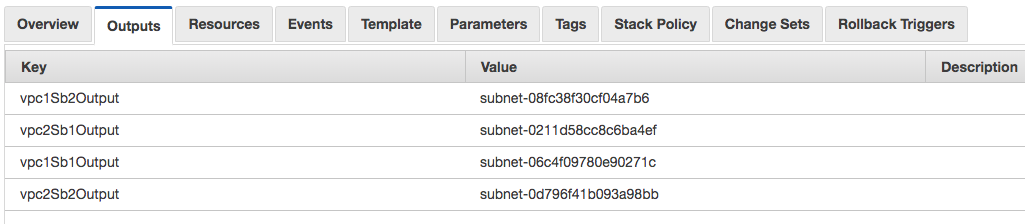
Here’s another example. In the following template, I need to get the subnet ID value for each of the subnets that I created through CloudFormation. I’m defining an output for four subnets (vpc1Sb1, vpc1Sb2, vpc2Sb1 and vpc2Sb2):
"Outputs": {
        "vpc1Sb1Output" : {
            "Description" : "",
            "Value" : {
                "Ref": "vpc1Sb1"
            }
          },
          "vpc1Sb2Output" : {
            "Description" : "",
            "Value" : {
                "Ref": "vpc1Sb2"
            }
          },
          "vpc2Sb1Output" : {
            "Description" : "",
            "Value" : {
                "Ref": "vpc2Sb1"
            }
          },
          "vpc2Sb2Output" : {
            "Description" : "",
            "Value" : {
                "Ref": "vpc2Sb2"
            }
          }
    }
Once the stack has run, I can see the outputs and the corresponding values (the subnet IDs) in the CloudFormation console:
Change Sets
OK, so I have my Cloudformation template defined, I’ve created a stack and observed some of the outputs from it. Now though, I’ve decided that I need to make some changes to my template. Perhaps there are some parameters that I need to change; maybe the name of one of my instances is wrong and I need to alter it.
I could easily update my template to reflect the change and then simply rerun it, but it would be handy if I could view the changes and verify what impact they will have before I actually execute it. With Change Sets, you can do just that.
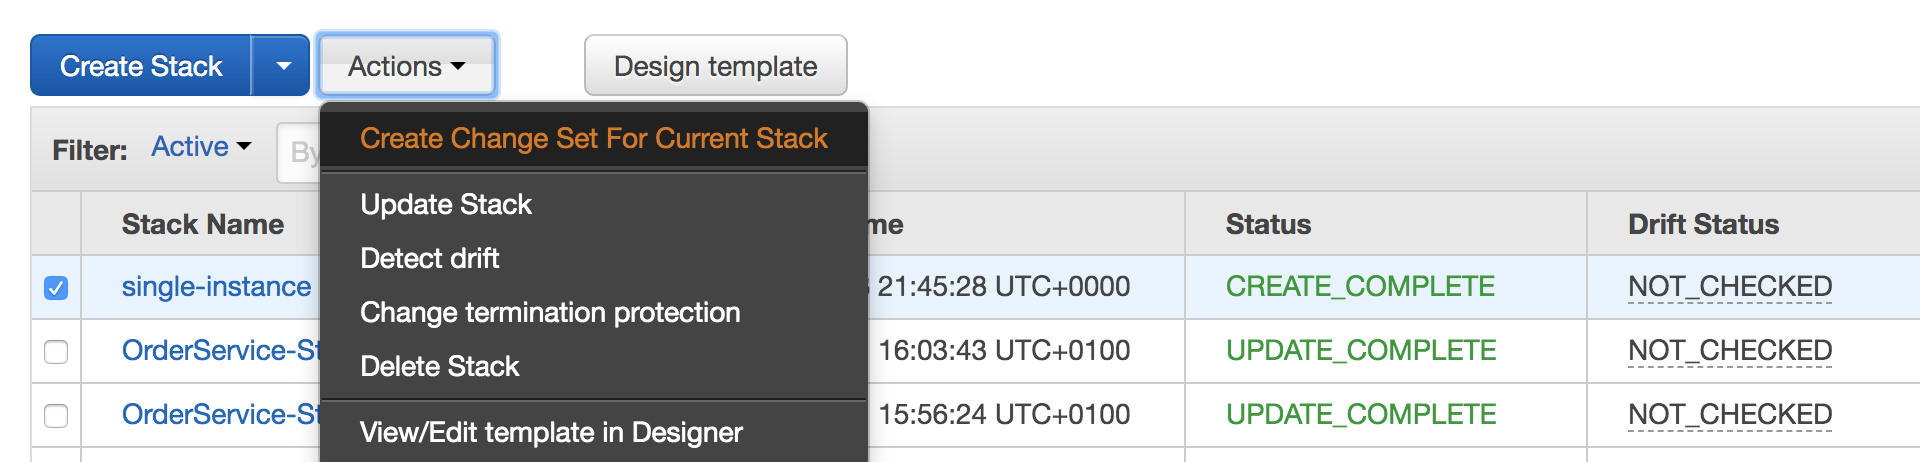
Here’s how it works: I have a Cloudformation stack named ‘single-instance’ deployed in my account - as the name implies, this template deploys a simple instance running Amazon Linux. I then decide that I want to make a change to the resource - specifically, I need to alter the size of the instance from t2.micro to m4.large. I make the change to the template and then create a new change set for the current stack:
I’ll then be asked for the template (similar to when the stack was first created) - once this is done and I’ve given the change set a name, I’ll be able to view the details of the change in the console:
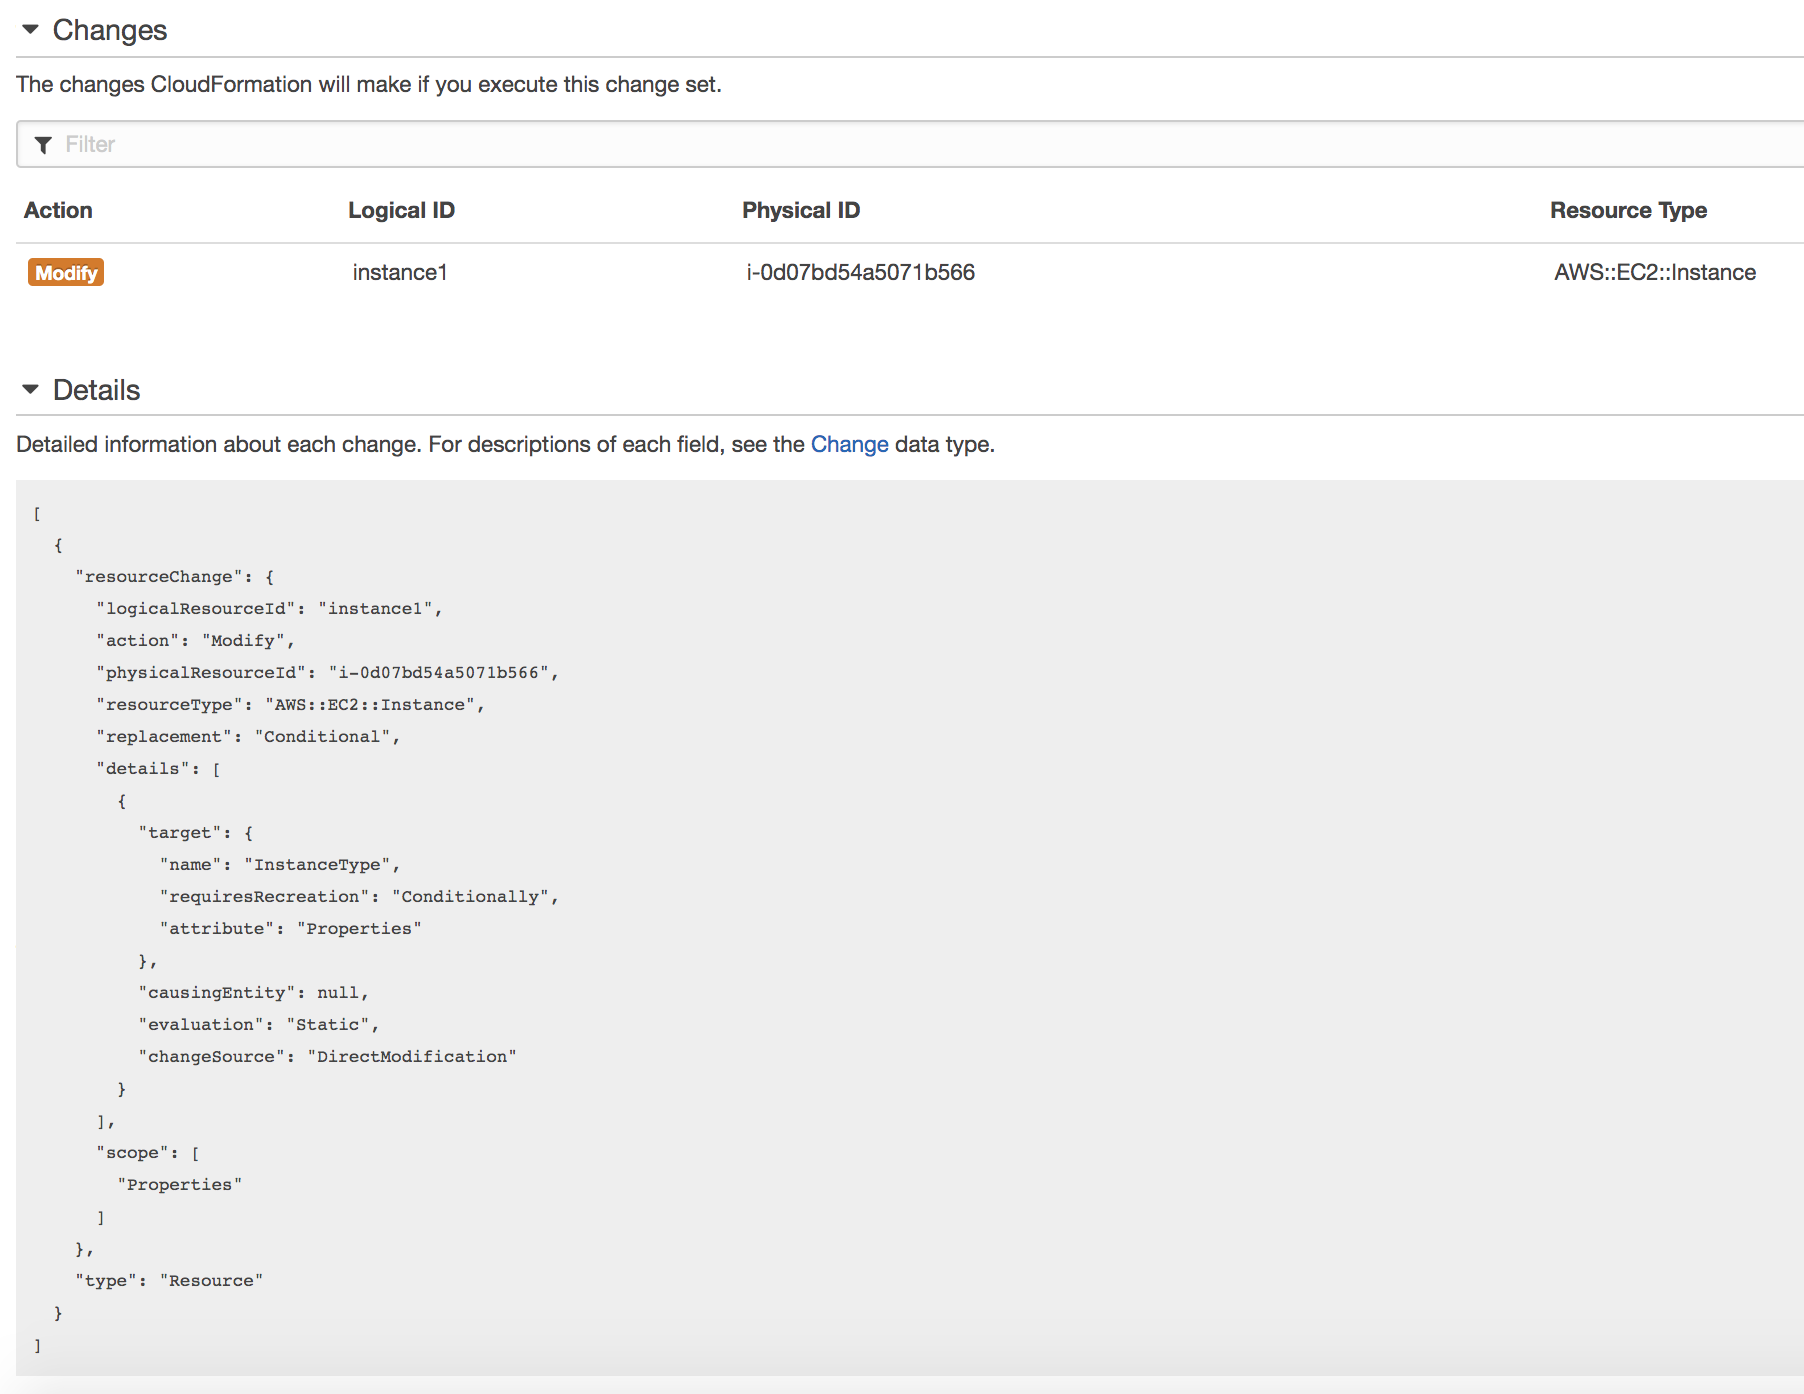
You can see in the details pane that the specific part of the template changing is the ‘InstanceType’.
I can then choose to execute the change set if the changes are acceptable, or delete the change set if I decide the changes aren’t what I want.
Drift Detection
One of the issues that some customers had in the past was how to manage the situation where a Cloudformation template was used to deploy resources, but then administrators were making changes directly to those resources rather than changing the template. There are lots of reasons why this might happen, for example a quick change is needed on a resource to fix a critical problem - the person making the change makes a note to go back and change the original template later so that everything is in sync, but never gets around to it. What I’ve described here is a scenario where the deployed stack has drifted from the original template. To alert you to this kind of problem, Drift Detection was introduced to Cloudformation.
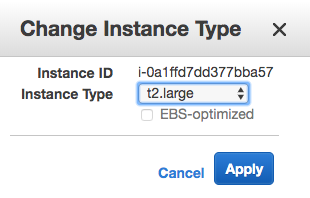
Drift Detection works by comparing the template used to deploy the stack to what the running stack actually looks like and can give you detailed information on the differences. Let’s look at an example. I’ve deployed the same ‘single-instance’ stack I used in the previous section to create single Amazon Linux t2.micro instance. After deployment though, the performance of this instance wasn’t where it needed to be, so I quickly went into the console and changed the instance type to t2.large:
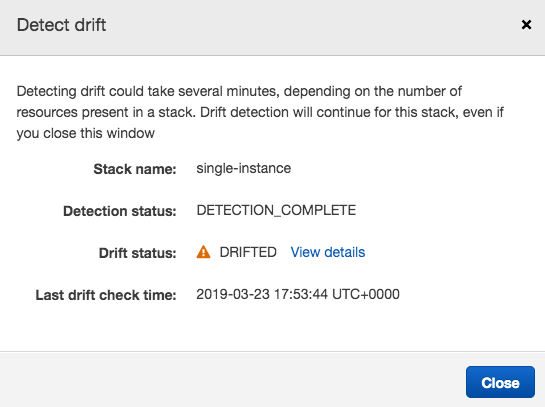
If I now go back to the Cloudformation console, select the stack and then choose ‘Drift Detection’ from the action menu, after a minute or so I’m told that there is indeed drift, with an option to view the details:
If I choose to view the details, I can see clearly the differences in the template (i.e. the instance size as t2.large vs t2.micro):

There’s a lot more to Cloudformation than I’ve been able to show you here - there is a huge amount of power and flexibility to allow you to automate the creation of resources inside AWS and we’ve only scratched the surface here. But hopefully this is enough to get you started :-)
Thanks for reading.