AWS Fundamentals - Part 6: Advanced EC2
20 Feb 2019In the last post, I covered the basics of EC2, including how instances are billed, which components make up an instance and then how to create and connect to your instance. In this post, we’re going to take a look at some of the more advanced aspects of EC2 - topics such as Auto Scaling, using Systems Manager to more effectively manage your instances and how to gather information about your instances using the built in metadata function.
Auto Scaling
Imagine you have an application that runs on a single EC2 instance. Most of the time, the number of people using that application is fairly low, but at certain times of the day (or on certain days), the number of users increases dramatically. How do you deal with this? You could “overprovision” the number of instances you use to support that application (i.e having the appropriate number of instances required to support the higher user count), but that means you are paying for those instances all of the time - even when they aren’t really being used. A better way to solve this problem would be to use the EC2 Auto Scaling feature.
The basic idea behind Auto Scaling is that the AWS platform will attempt to keep the number of provisioned instances at a “desired” level. If you specify that your desired number of instances is five, then EC2 will add instances if necessary to meet that requirement. So if one out of the five instances should fail, the platform will automatically add another instance to bring the total number back up to five.
In addition, Auto Scaling will add or remove instances automatically whenever a particular condition is met. So for example, you might define a condition that states that if the CPU utilisation of your instances breaches a threshold (let’s say 70%), Auto Scaling will begin to create more instances for you.
Launch Templates & Configurations
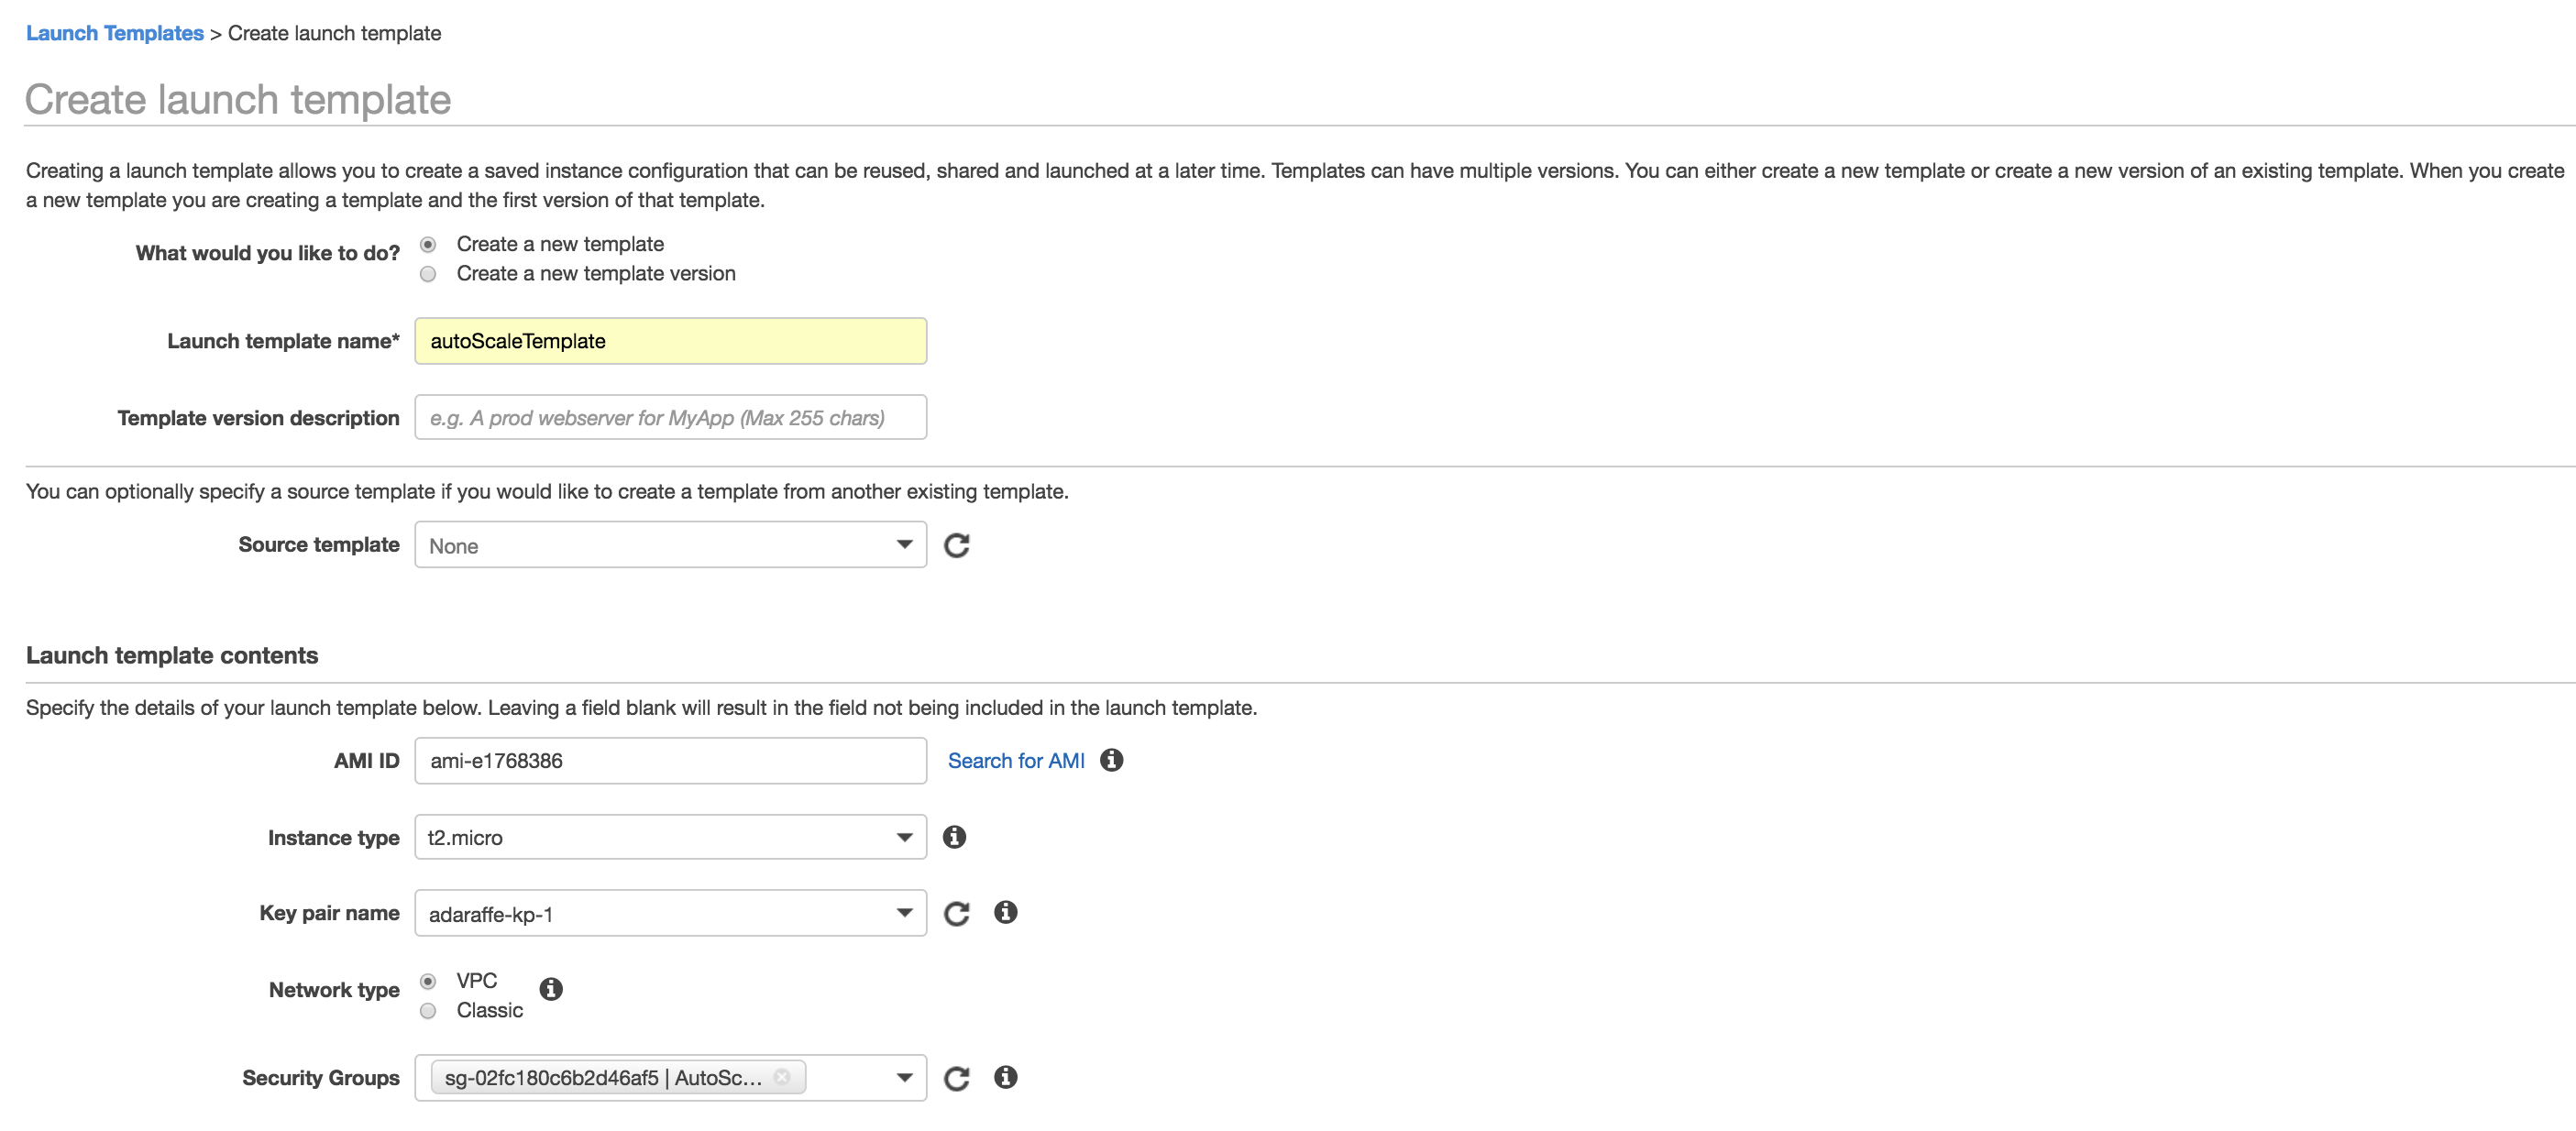
The first thing you’ll need to do when setting up an Auto Scaling group is define either a Launch Template or Launch Configuration. These are similar in that they both allow you to define how the instances within your Auto Scaling group should look, but Launch Templates are newer and slightly more flexible, allowing for updating and versioning. A Launch Template or Launch Configuration is simply a template from which the instances in your Auto Scaling group will be created. What does a Launch Template or Configuration consist of? Well, mostly the same kind of parameters as if you were defining an instance directly - you will need to specify parameters such as the AMI to use, an instance type (e.g. T2.Micro), the network interface parameters and storage details. Here’s an example of how a Launch Template is created:
Auto Scaling Groups
Once you have your Launch Template / Configuration, you can go on to create an Auto Scaling Group. This allows you to specify parameters such as how many instances are desired, which specific VPC should be used for the deployment and any scaling policies and notifications you may wish to set up. A scaling policy might state that you want to increase the amount of EC2 instances whenever a specific condition is met (such as CPU utilisation hitting a certain percentage). The AWS platform will monitor this condition inside your Auto Scaling group and then attempt to increase the number of instances once this condition has been met. This screenshot shows a simple scaling policy that will try and add additional instances once the CPU utilisation exceeds 50%:
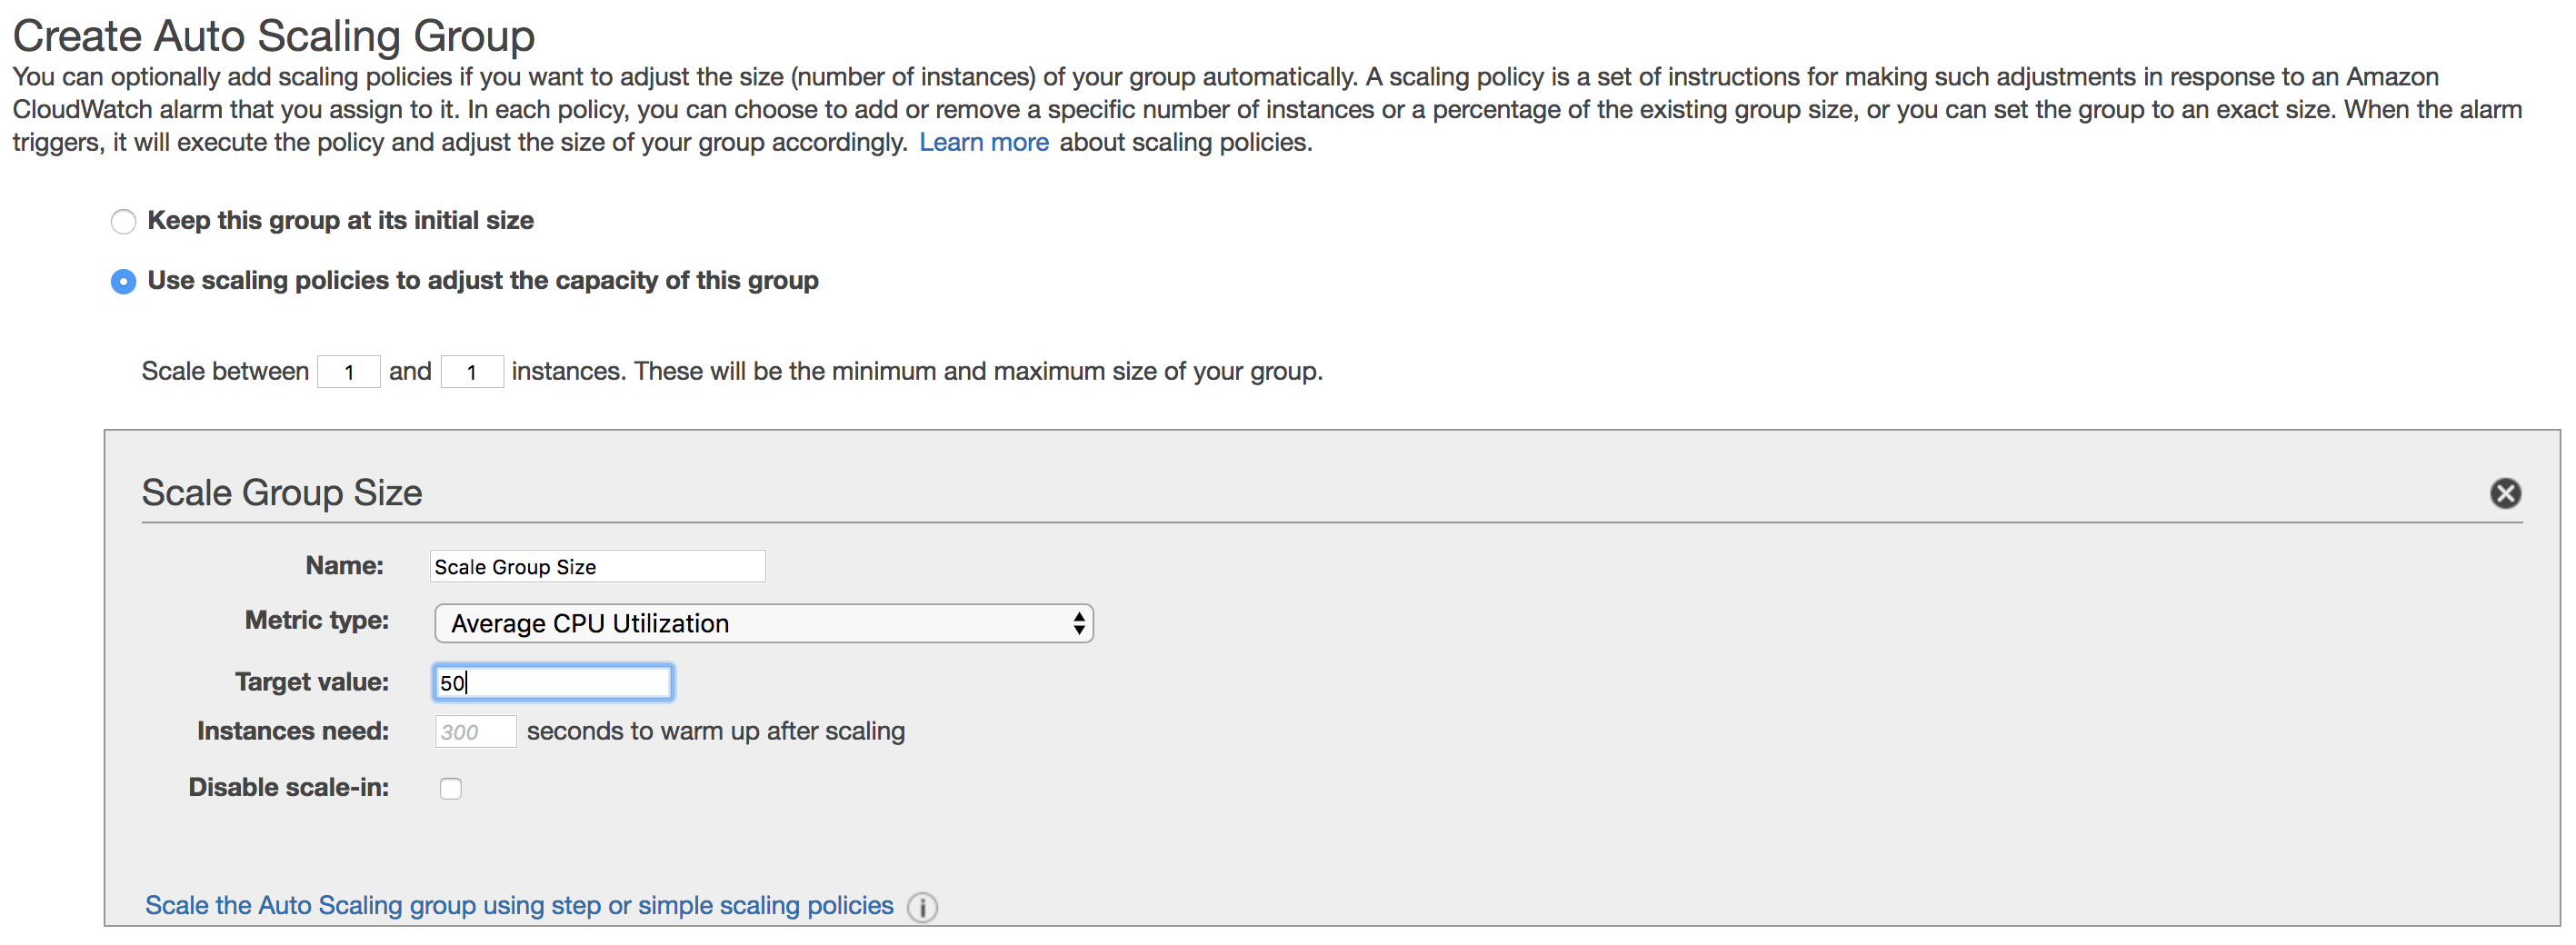
It’s also possible to add “step” policies, which allow you to specify additional steps for scaling - for example, step 1 could add two additional instances when the CPU utilisation is between 30 and 50%. Step 2 could add two more instances when the CPU utilisation is between 50% and infinity.
Systems Manager
Next up, let’s take a look at what EC2 Systems Manager has to offer. Systems Manager was introduced towards the end of 2017 - it isn’t actually one feature, but more a collection of features that are designed to simplify the management of and provide greater insight and visibility into your cloud environment. One of my favourite features of Systems Manager is the ability to group AWS resources together using the Resource Groups feature.
Resource Groups
What is a resource in AWS? A resource is pretty much anything you can work with, such as an EC2 instance, an S3 bucket, a VPC and so on. As your environment grows, it’s likely that the number of resources that you are using will grow over time. Without a way to organise these resources, things may start to get a little confusing and difficult to manage.
Enter Resource Groups. The idea behind resource groups is simple - provide a way to logically organise the resources in your AWS account and allow you to perform actions on those resources together. How do resources “get” into a resource group? The primary method for allocating resources to resource groups is by using tags. A tag is essentially a label; a way to categorise resources. Tags consist of a key value pair - so for example, I could tag all resources that I own with something like this:
Owner = Adam
OK, that’s easy enough to understand, but how do we use tags to group our resources together into resource groups? Well let’s say I have an application called “App10”, which uses a number of EC2 instances. I’d like to manage those instances together if possible, so I might apply tags to all of the EC2 instances that are used for the “App10” app as follows:
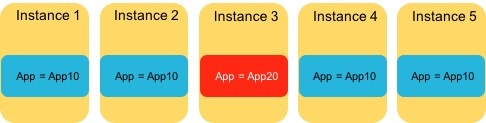
Note that I also have one other instance that is used for a completely separate app (“App20”), but I don’t want to include that in the group and so have given it a different tag.
Now, I click on ‘Resource Groups’ at the top of the AWS console - I create a new group and then use a resource type of “AWS::EC2::Instance” and a tag of “App: App20”, as shown in the following screen shot:
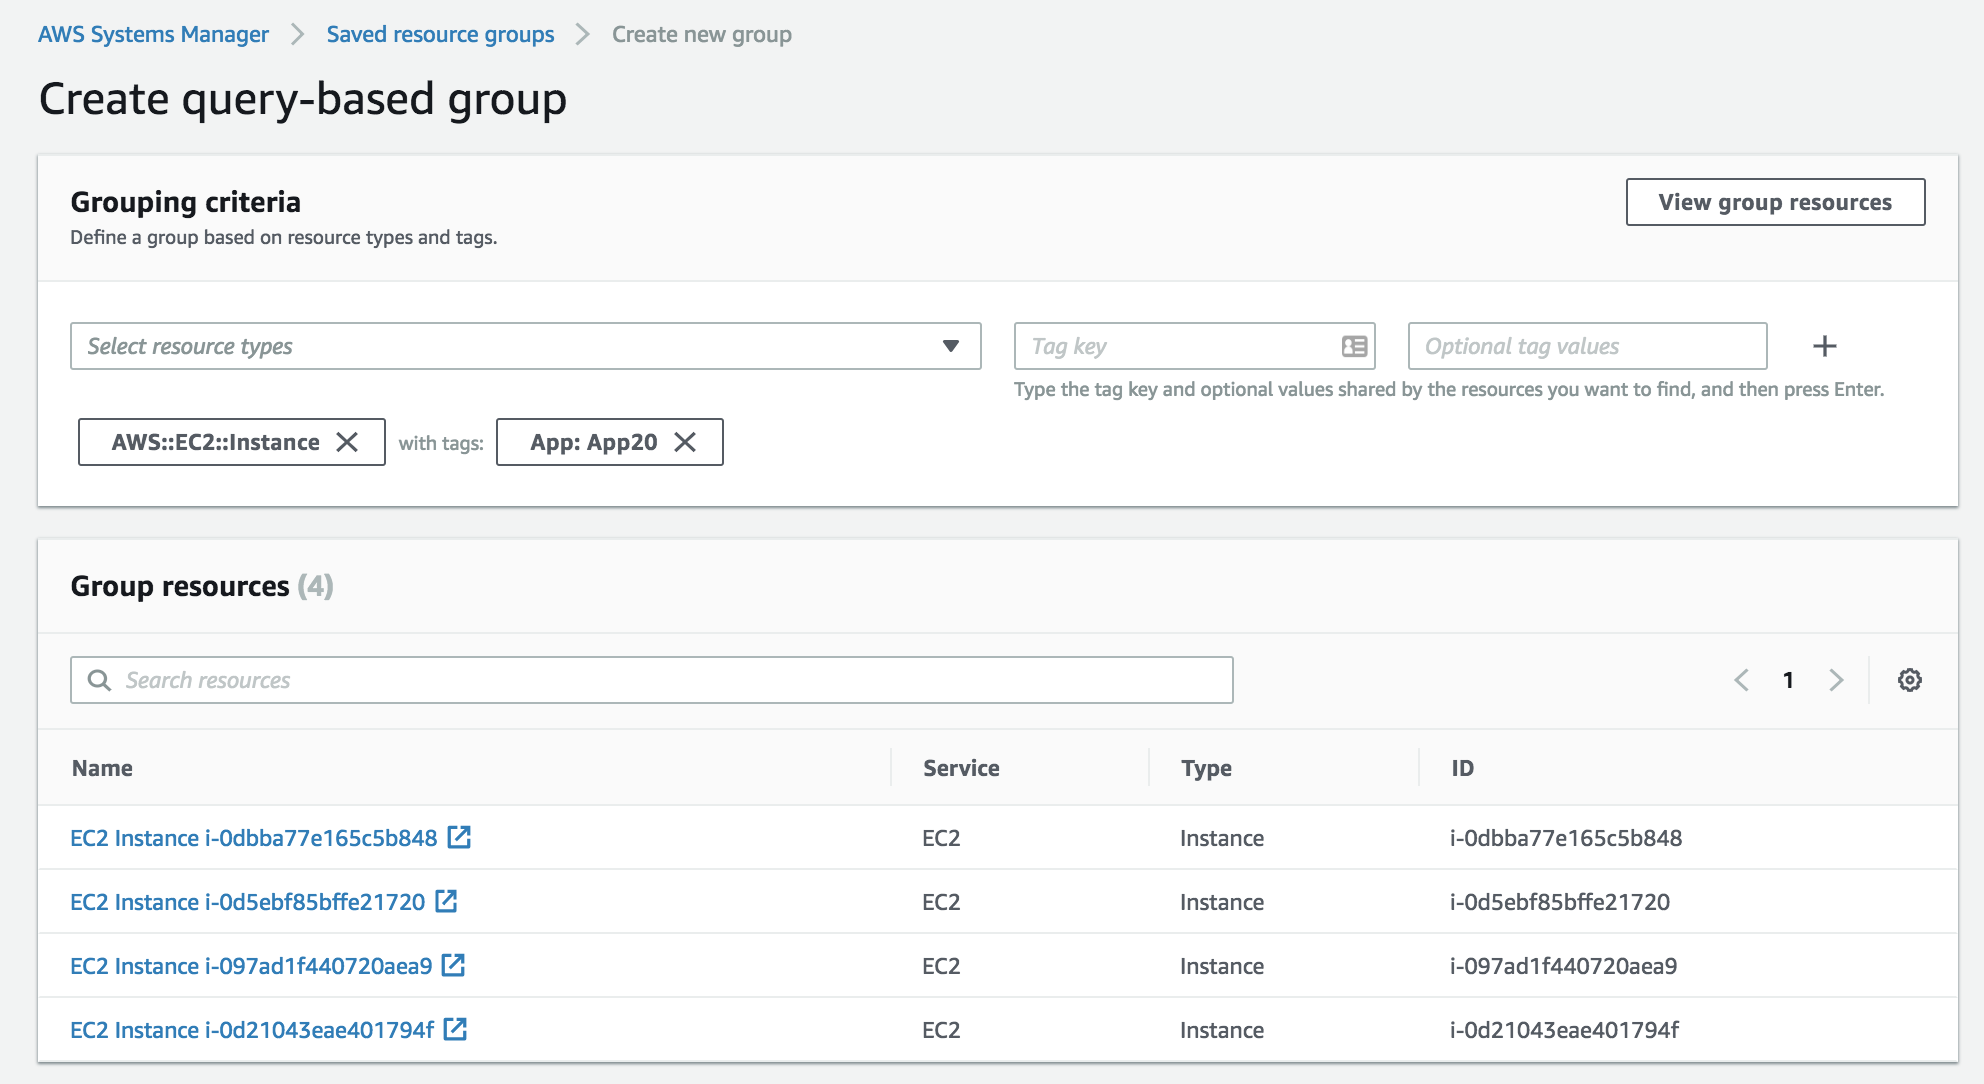
You can see from this that four instances have been identified and will therefore be members of this resource group. Further down on the screen, I can name the resource group, as well as apply a tag to the resource group itself (resource groups can be nested).
I could also have created this resource group from the AWS CLI, for example:
aws resource-groups create-group --name App20-RG --resource-query '{"Type":"TAG_FILTERS_1_0","Query":"{\"ResourceTypeFilters\":[\"AWS::EC2::Instance\"],\"TagFilters\":[{\"Key\":\"App\",\"Values\":[\"App20\",\"Value2\"]}]}"}'So, now that we have a resource group in place containing a number of resources, what can we actually do with it? Well, at this point, we can start looking at the other features available within Systems Manager - first up, Insights.
Insights
The Insights functionality found Systems Manager is focused primarily on the inventory and compliance within your environment. By clicking on ‘Inventory’ within the Systems Manager console, you can quickly get a view of the managed instances you are running (a managed instance is simply an EC2 instance that has the appropriate software to allow it to be managed by Systems Manager), as well as the operating systems and OS versions, plus the applications running on those instances:

As you can see, it’s possible to filter by resource group or other criteria, such as tags and inventory type. Insights also has a built-in compliance view, which lets you easily look at patch management and configuration rules that you might want to apply to your environment.
Run Command
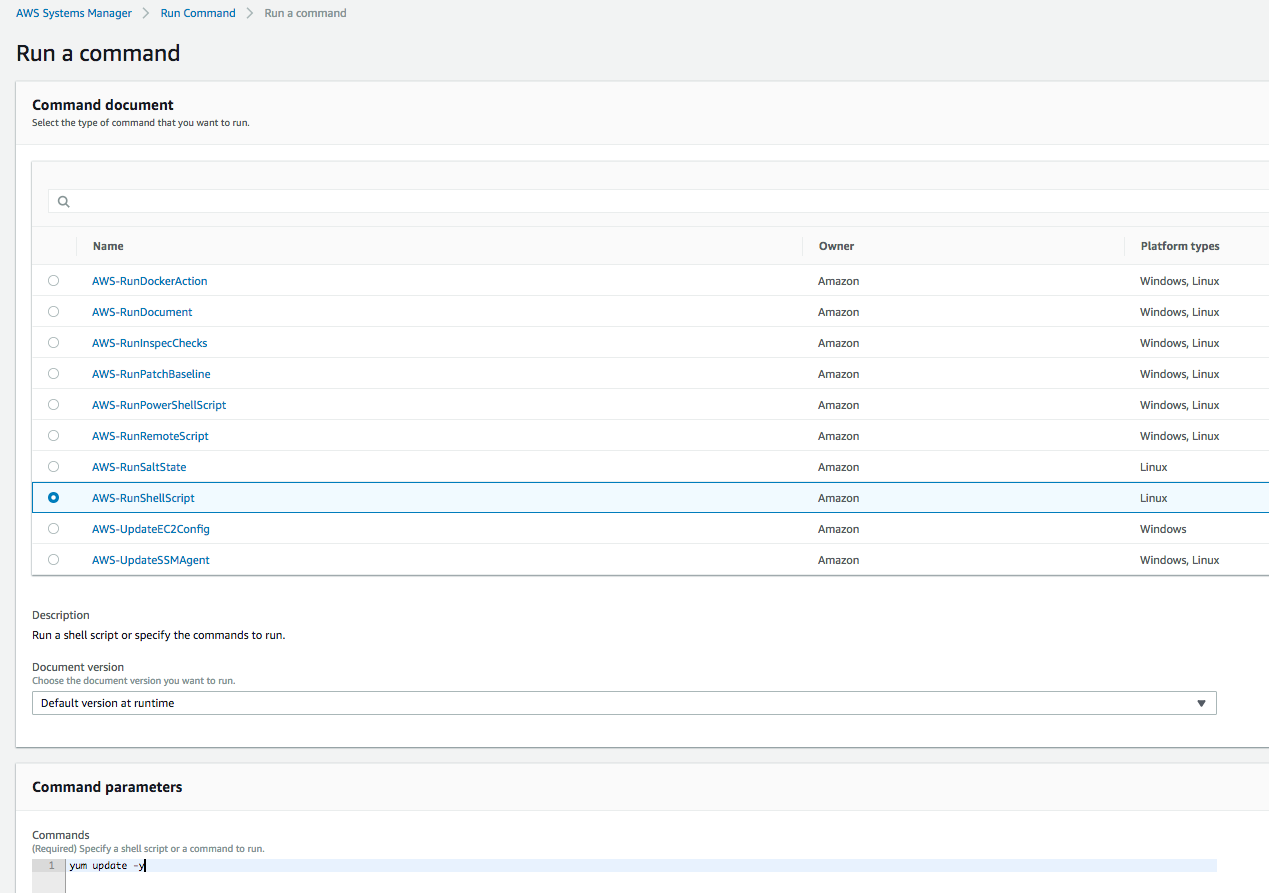
SSH’ing into machines is so old hat isn’t it? What if you didn’t have to bother with that and instead had the ability to remotely run commands on your instances? Step forward, Run Command. Here’s an example - I want to run a shell script on each of my managed instances. Rather than using SSH to get into each machine individually and running the script, I can use Run Command to do this instead:
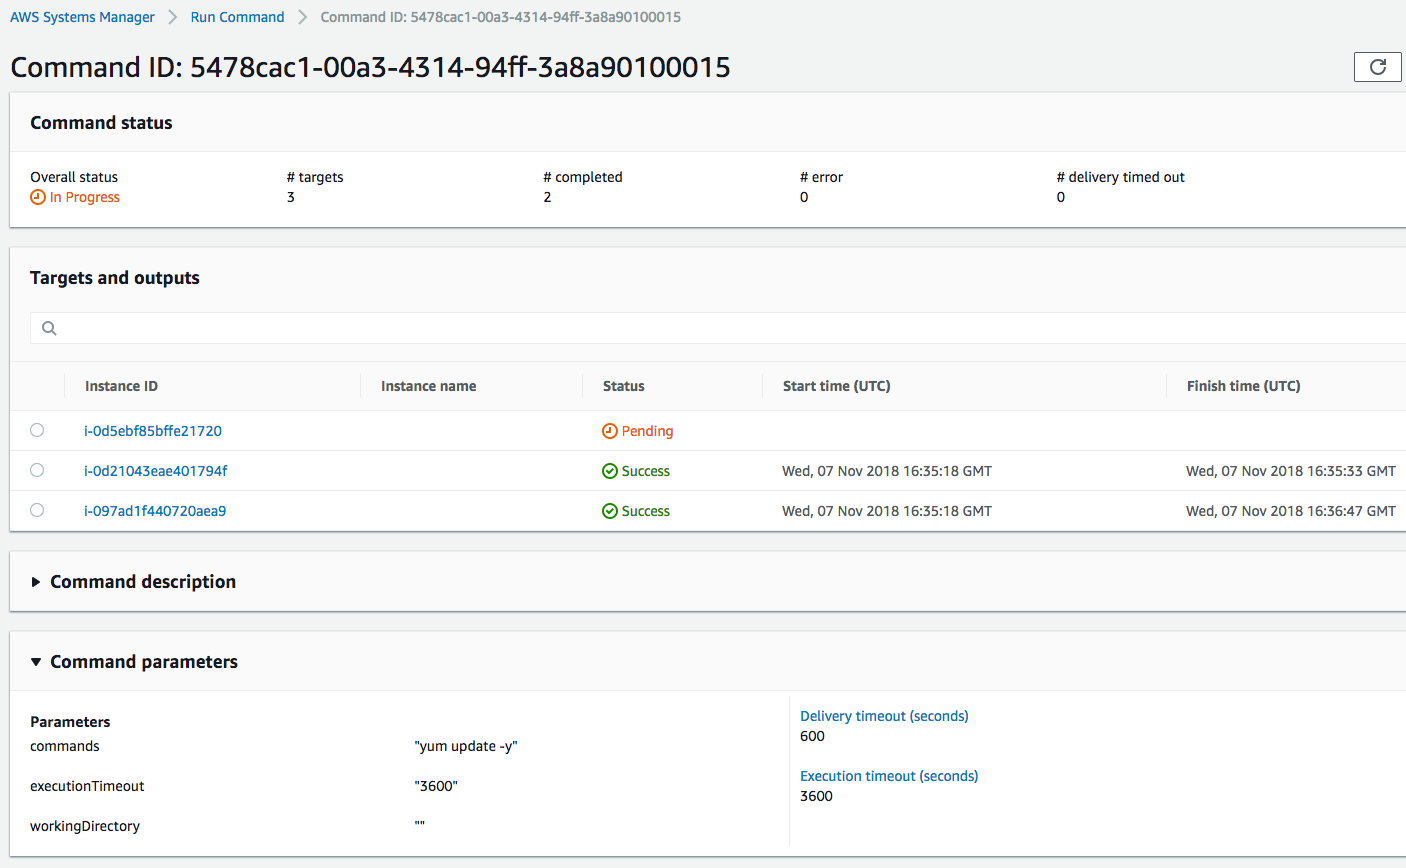
Once I click the ‘Run’ button, the command executes on each instance:
There are a number of other features within Systems Manager that I won’t cover here, including Session Manager (a feature that lets you gain access to the shell of an instance through the browser), Patch Manager and State Manager (allows you to manage the state of your instances, for example anti-virus or firewall settings).
Instance Metadata
The EC2 instances that you run on AWS include a large number of configuration items and settings - for example:
-
Which AMI (Amazon Machine Image) was used to create the instance?
-
What role is assigned to instance currently?
-
What IP addresses are associated with the instance?
-
Which Availability Zone is the instance running in?
There are lots of others, but the point is that it would be handy if there was a way to gain access to this information from within the instance itself. This is where Instance Metadata comes in. Let’s see how this works.
In the following example, I’m SSH’d into one of my Linux EC2 instances. To access the metadata for the instance, you simply need to make an HTTP request to a specific end point in the form of http://169.254.169.254/latest/meta-data/. So if for example, I want to know the host name of my instance, I can use the Curl tool to make the request:
[ec2-user@ip-10-0-1-171 ~]$ curl http://169.254.169.254/latest/meta-data/hostname
ip-10-0-1-171.eu-west-2.compute.internal
Getting the host name isn’t all that interesting, so let’s see if we can get the IP address of my instance:
curl http://169.254.169.254/latest/meta-data/network/interfaces/macs/06:9b:50:d3:55:fa/public-ipv4s
35.176.155.6
I can also find the private IP of my instance that is associated with the public IP address above:
curl http://169.254.169.254/latest/meta-data/network/interfaces/macs/06:9b:50:d3:55:fa/ipv4-associations/35.176.155.6
10.0.1.171
OK, that just about wraps it up this post and for EC2. In the next post, we’ll cover one of my favourite topics: networking.