AWS Fundamentals - Part 5: Elastic Compute Cloud (EC2)
20 Feb 2019The Elastic Compute Cloud (EC2) service is one of the best known and widely used services that AWS offers. What it provides is fundamentally quite simple: the ability to provision virtual machines (known as instances in AWS speak) on demand. In contrast to many of the ‘managed’ services on offer, with EC2 the user has complete control over the provisioned instances and is responsible for all software installation, configuration, patching and so on.
One of the first things to understand about EC2 is how you are billed for it; let’s take a look.
EC2 Billing
There are three main ways to pay for EC2 instances; which one you choose really depends upon how you are using the service, whether you are willing to make a spending commitment in return for lower prices and so on.
On-Demand Instances
The on-demand pricing model essentially provides you with a ‘pay-as-you-go’ type of approach - you simply spin up your instance and then pay for the amount of time it is running. And that’s really it - you don’t need to make any kind of commitment, up front payments, etc.
So when would you use on-demand instances? Think about any kind of short term requirement such as testing, development of a new app, or learning about the platform. In those cases, users probably don’t want to make any monetary commitment up front as they won’t know how much time they need their instances for.
So how much does it cost to run an on-demand instance? That depends on many different factors, such as the instance size (see later section), the operating system chosen (Linux is normally going to be cheaper than Windows) and perhaps even the AWS region you are running the instance in.
It used to be the case that EC2 instances were billed per hour, however this changed some time back. Nowadays, instances are billed per second (albeit with a 60 second minimum). So if I spin up an instance and use it only for 30 seconds, I’ll be billed for one minute. This is also the case for spot and reserved instances, which needs us nicely into the next section.
Reserved Instances
Let’s say you know that you will need to run a certain number of instances for the foreseeable future - in that case, on-demand pricing might not make too much sense. A better option would be to make use of EC2 reserved instances. The idea here is that you make an up front payment to AWS for the instances you want to run for a period of time (such as 1 or 3 years) - by doing so, you can enjoy significant discounts (sometimes up to 75%) over on-demand pricing.
One other advantage of reserved instances is that you can also reserve a certain amount of capacity in a specific availability zone - for example, if I select the AZ ‘eu-west-2a’ when provisioning my reserved instances, I have some additional peace of mind in that I know there will be capacity available for my instances.
There are a few types of RI available depending on how you might wish to use them - more information is available on the RI pricing page here.
Spot Instances
Imagine you are responsible for running a cloud platform such as AWS. Inevitably, there are going to be parts of the infrastructure that - at times - are not necessarily being used, but that need to be kept available to provide capacity to users if required. It might therefore make sense for you to offer that unused infrastructure out to users at a lower price, on the proviso that you may need that infrastructure back at any point with very little notice.
What I’ve described above is essentially how spot instances work - they provide the ability to provision EC2 instances at a lower price than if using the on-demand pricing model. Here’s how spot instances work:
-
The user creates a spot instance request. This request includes (among other things) the maximum price that the user wishes to pay for their instances.
-
AWS publishes a list of spot prices for each type of instance. You can find the up to date spot pricing on this page.
-
If the maximum bid price in your spot instance request is higher than the current spot price for the instance in question, your instance will be provisioned (assuming there is capacity available of course).
-
If the maximum bid price in your request is lower than the current spot price, the instance will not be provisioned, or in the case of currently running instances, those instances will be terminated.
What could cause your maximum bid price to be lower than the current spot price? Well, the spot price can move (depending on a number of factors such as demand and capacity), so it is possible that the spot price could rise above your maximum bid price at some point. To help you set your maximum price, you can view the spot price history using the AWS console or command line.
At first glance, the thought of provisioning instances that AWS can whip out from under you at any moment might not sound that appealing. However, there are some valid use cases - think about extremely fault tolerant applications such as Hadoop or image rendering, as well as in cases where some downtime is acceptable (test servers for example).
Components of an Instance
What is an instance made up of? If you think about an ‘on-premises’ server, that would typically be built using a number of components, including processor, memory, disk, network interfaces and so on. An instance or virtual machine running in the cloud should therefore be thought of in a similar kind of way - an AWS instance is not a single ‘thing’, but instead consists of a number of components, all of which are extremely important for the proper deployment and operation of that instance. Let’s have a look at these components:
Instance
Number 1 on the list is the instance itself - obviously without this, there isn’t much point in having the additional components mentioned below. An instance is the primary method for providing virtualised computing power in AWS. An instance will have a specific configuration, such as the operating system, the amount of CPU and memory, as well as the state of the instance (e.g. running or stopped). There are a huge variety of instance sizes available to cover almost every conceivable use case, ranging from very small (e.g. 2 vCPUs and 0.5Gb of memory) to huge, high performance machines with terabytes of memory and over 100 vCPUs.
Amazon Machine Images (AMIs)
If the instance size discussed in the last section defines the ‘hardware’ configuration of the instance (CPU, memory, etc), what defines the software configuration of the instance? For that, we look to Amazon Machine Images, or AMIs for short. So what does an AMI define exactly? First and foremost, it defines the operating system that will run on the instance. A huge number of AMIs are available - if you just want an instance that runs Ubuntu, there’s an AMI for that. Prefer Windows? No problem, there are multiple AMIs available for that too. There’s even an entire marketplace where you can find AMIs from 3rd party vendors, to run everything from firewall software to computational molecular biology machines.
But what if you can’t find - among the tens of thousands of AMIs available - the exact configuration you need? Well that’s not an issue either - you simply create your own. After customising the instance, creating a new AMI from that instance is a trivial matter that involves EC2 creating a snapshot, from which your new instances will be created in the future. Once you’ve created your AMIs, you can make them public, or keep them private for your own use only.
One other important thing an AMI defines is the disk configuration of your instance - specifically, whether the root device of your instance uses EBS or instance store. These are new terms, so that brings me nicely to the next section: disks.
Disks
Every instance that you provision requires a disk to be attached to it. AWS provides two main methods for how you attach those disks: Instance Store or Elastic Block Store (EBS) volumes. What’s the difference?
Instance Store Based Disks
With an instance store, the underlying host computer that your EC2 instance is running on has disks physically attached to it - your instance disk is provisioned on this directly attached drive, as shown below.
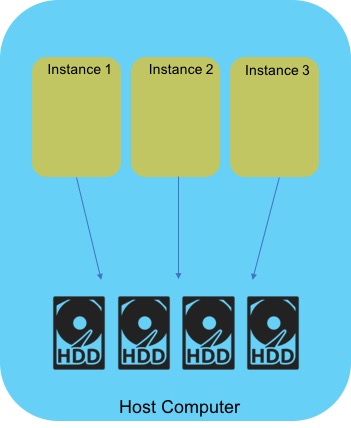
Sounds good, but what happens if the host computer your instance is running on fails? In that case, any data you have stored on the disk will be lost. The same is true if the instance is stopped or terminated. Because of this, it’s quite unwise to store any data that needs to be kept permanently on an instance store based disk - instance stores are really only suitable for temporary data that you don’t mind losing.
If you have data that must be retained on a longer term basis, you need to look at EBS based volumes instead.
Elastic Block Store (EBS) Volumes
An EBS volume is a block based storage device that you can attach to your EC2 instance. The key difference between an EBS volume and an instance store is that the EBS volume does not live on the underlying host machine, but instead is independent from the host. This means that the instance can be stopped or terminated, but the data on the EBS volume will persist.
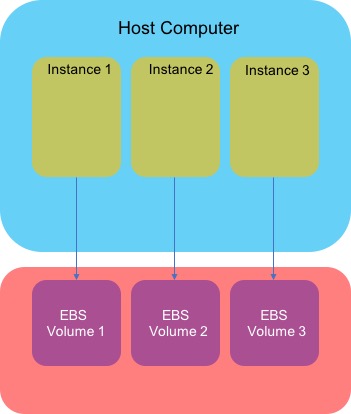
EBS volumes are also highly available - they are replicated within an Availability Zone (AZ) to avoid the situation where hardware failure results in loss of data.
I’ll cover EBS in some more detail in a subsequent post.
Network Interfaces
Just as a physical server needs a network interface card (NIC) in order to connect to a network, an instance must also have some means of connecting to the networking environment. In AWS, this is achieved through an Elastic Network Interface, or ENI for short. An ENI is simply a virtual network card that attaches to an instance and is used to connect to a Virtual Private Cloud (VPC - more on this in the networking post later on).
An ENI will typically have one or more IP addresses associated with it - depending on requirements, this might include one or more private IPv4 addresses, a public IP address, an Elastic IP address (this is essentially a static IP address that remains in your account and is available to be allocated to instances / ENIs), or a number of IPv6 addresses.
Note also that you can attach more than one ENI to an instance - how many you can attach is dictated by the instance type (e.g. c1.medium, c4.large and so on). Why would you want to do this? One reason is that you might want to separate the management traffic to your instances from the production traffic. You could achieve this by attaching two ENIs - one could attach to a public facing subnet for production traffic, with the other ENI attaching to a separate, private subnet.
Instance Types
Physical, on-premises servers come in all sorts of different configurations, with varying amounts of CPU and memory; AWS instances are no different. There are a wide variety of instance types available - an instance type defines the CPU performance, amount of memory, storage options and networking performance.
As there are such a huge array of instance types available, there’s no way I can list every one out here. However, the instance types are grouped together into a number of categories - currently these are as follows:
-
General Purpose
-
CPU Optimised (with comparatively high CPU performance).
-
Memory optimised (with higher amounts of memory - typically used for memory intensive applications such as in-memory databases).
-
Accelerated Computing - graphics and GPU instances.
-
Storage Optimised - with high performance local storage
New instance types are being added regularly - for the most up to date information, have a look at this page.
Creating an Instance
OK, we know now what components make up an instance. How do we actually create and run one? Running an instance is a fairly simple process that can easily be performed from the AWS console, from the CLI or using an infrastructure as code tool as such as CloudFormation.
The first thing you’ll need to do when running an instance is to select the AMI you want to use:
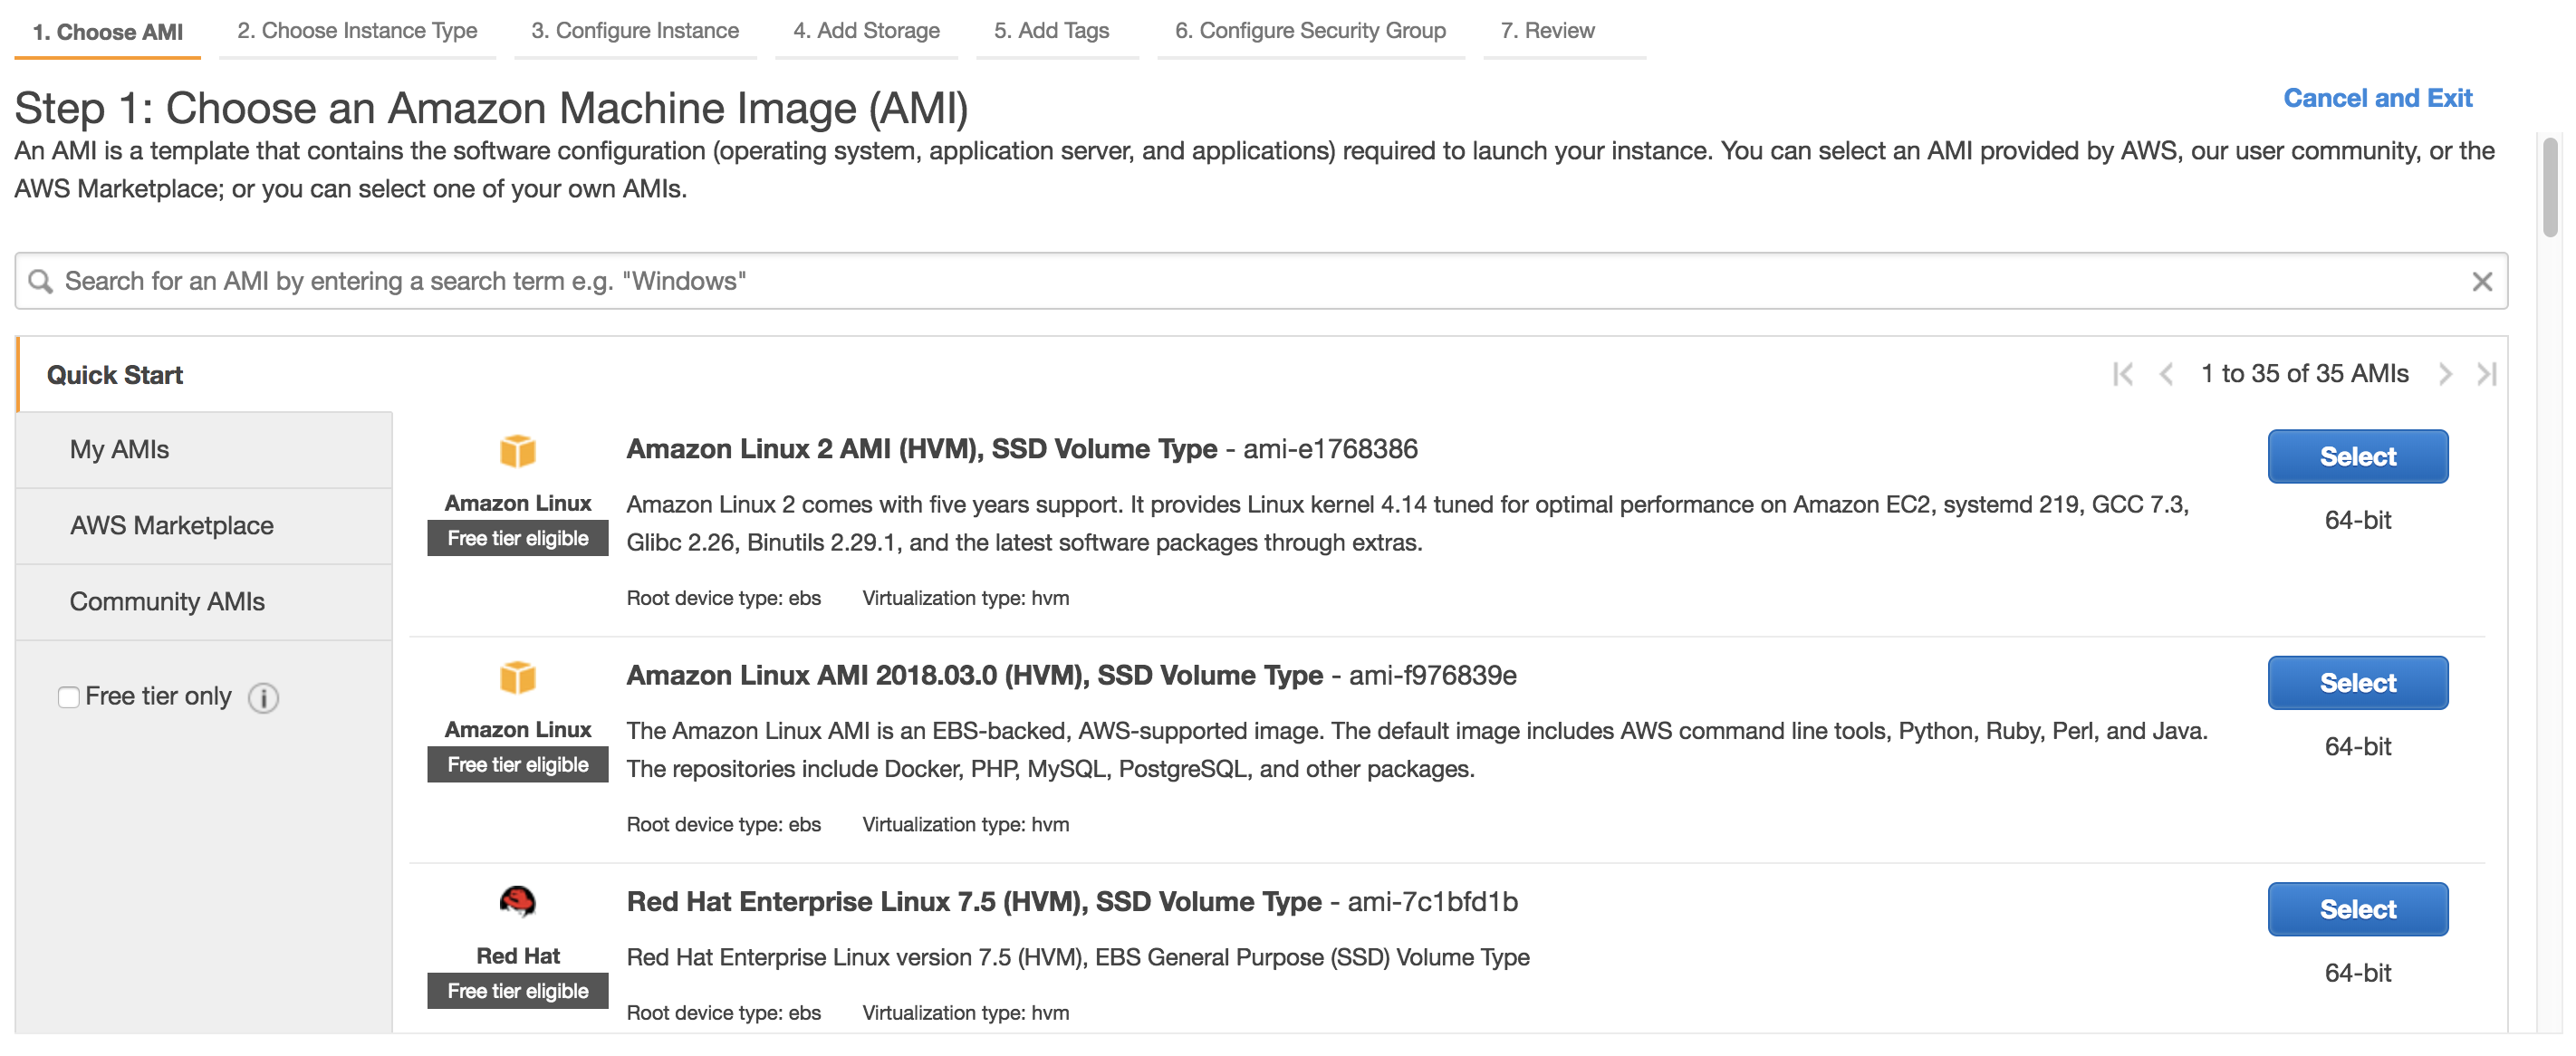
In the above screenshot, you can see a couple of Amazon Linux images, plus a Red Hat image, but as stated in the section above, there are a huge amount of AMIs available. Next, you’ll choose the instance type (e.g. T2, M4 and so on) depending on the computing power you need.
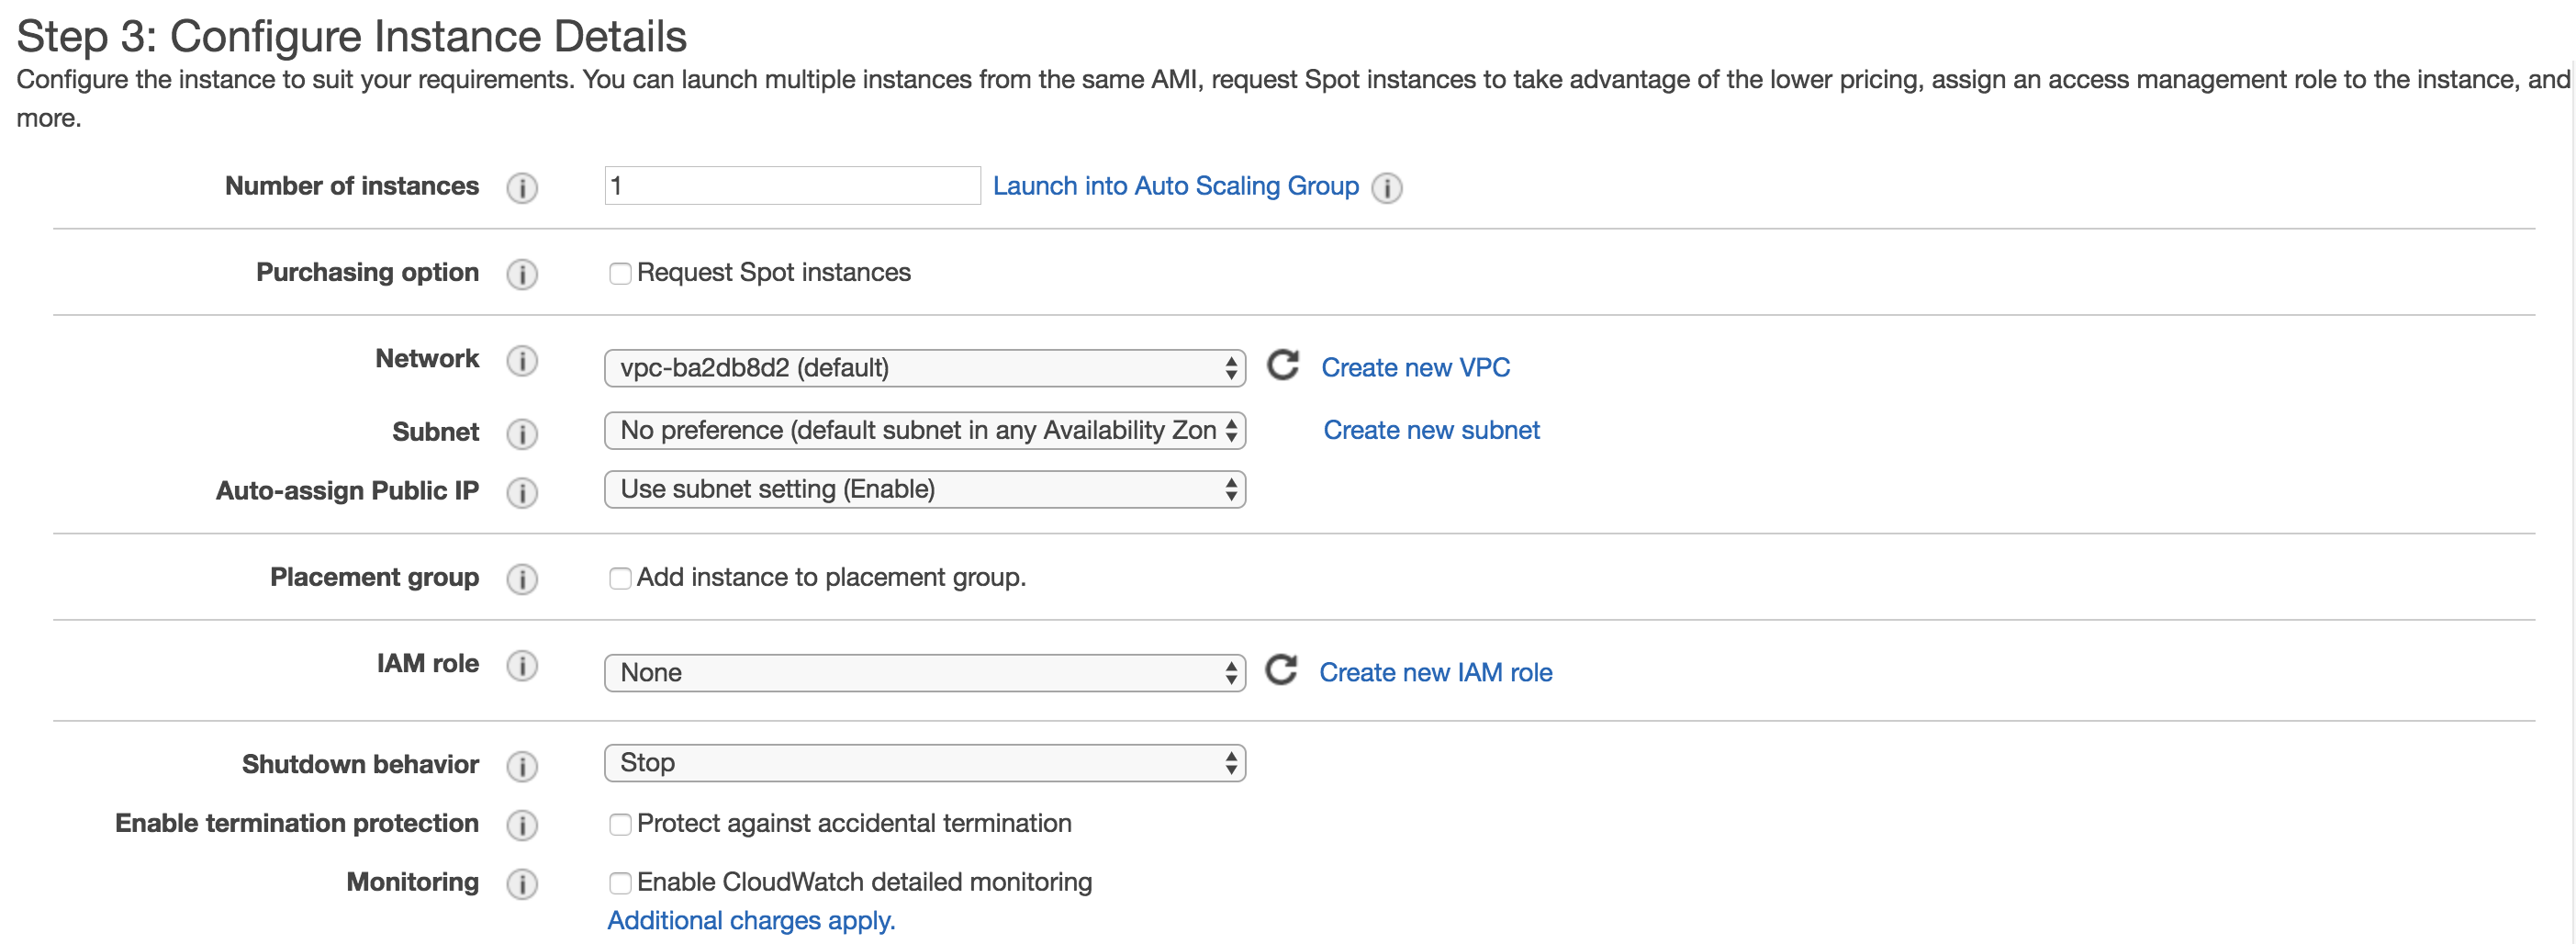
On the next screen, you have a few configuration choices. From here, you can choose the number of instances to launch, whether to purchase spot instances and the VPC / subnet you wish to deploy your instances into. You can also assign an IAM role to your instance at this point (for example, if you want your instance to have access to S3, you might wish to assign a role with permissions that allow this).
Next, you’ll select the storage configuration for your instance (EBS, instance store, etc), followed by the tag configuration (tagging your instances is a good idea) and finally the security group configuration (I’ll cover security groups in the section on networking). And that’s it! At this point, you can hit the ‘Create’ button and your instance will spin up in one or two minutes.
Connecting to your Instance
Just before you launch your instance, a dialog box will pop up asking you to either create a new key pair, or to select an existing key pair:
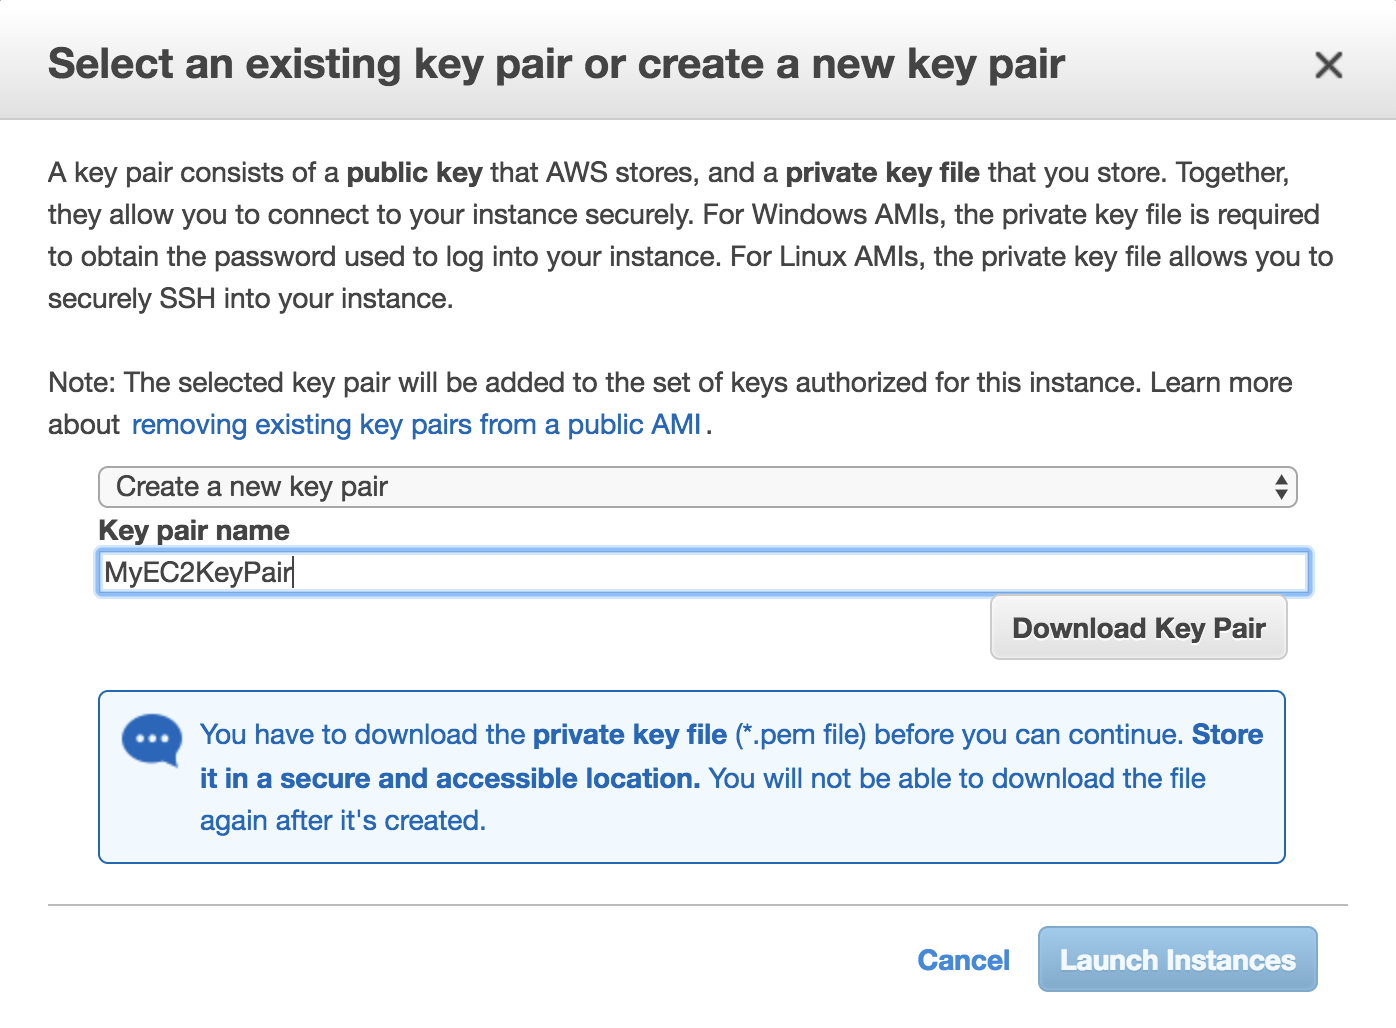
You’re going to need this key pair in order to access you instance using SSH, so make sure you create this key pair and download it at this point as you won’t get the chance again. Once downloaded, you need to change the permissions on the .pem file as the default permissions are not restrictive enough:
chmod 400 MyEC2KeyPair.pemOnce the instance is ready, you can SSH into it using the following command:
ssh ec2-user@\<public-ip\> -i \<pem file\>OK, we’ve covered a lot in this post - how EC2 instances are billed, the components of an instance, how to create an instance and then how to connect to it. In the next section, I’m going to look at a few more advanced aspects of EC2, such as Auto Scaling, Systems Manager and gathering information about your instances using the built in metadata functionality. See you there!